
Screenshot walkthrough
How to compress an image
Compress a copy, compare it with the original, then download it. trsh leaves your source file unchanged.
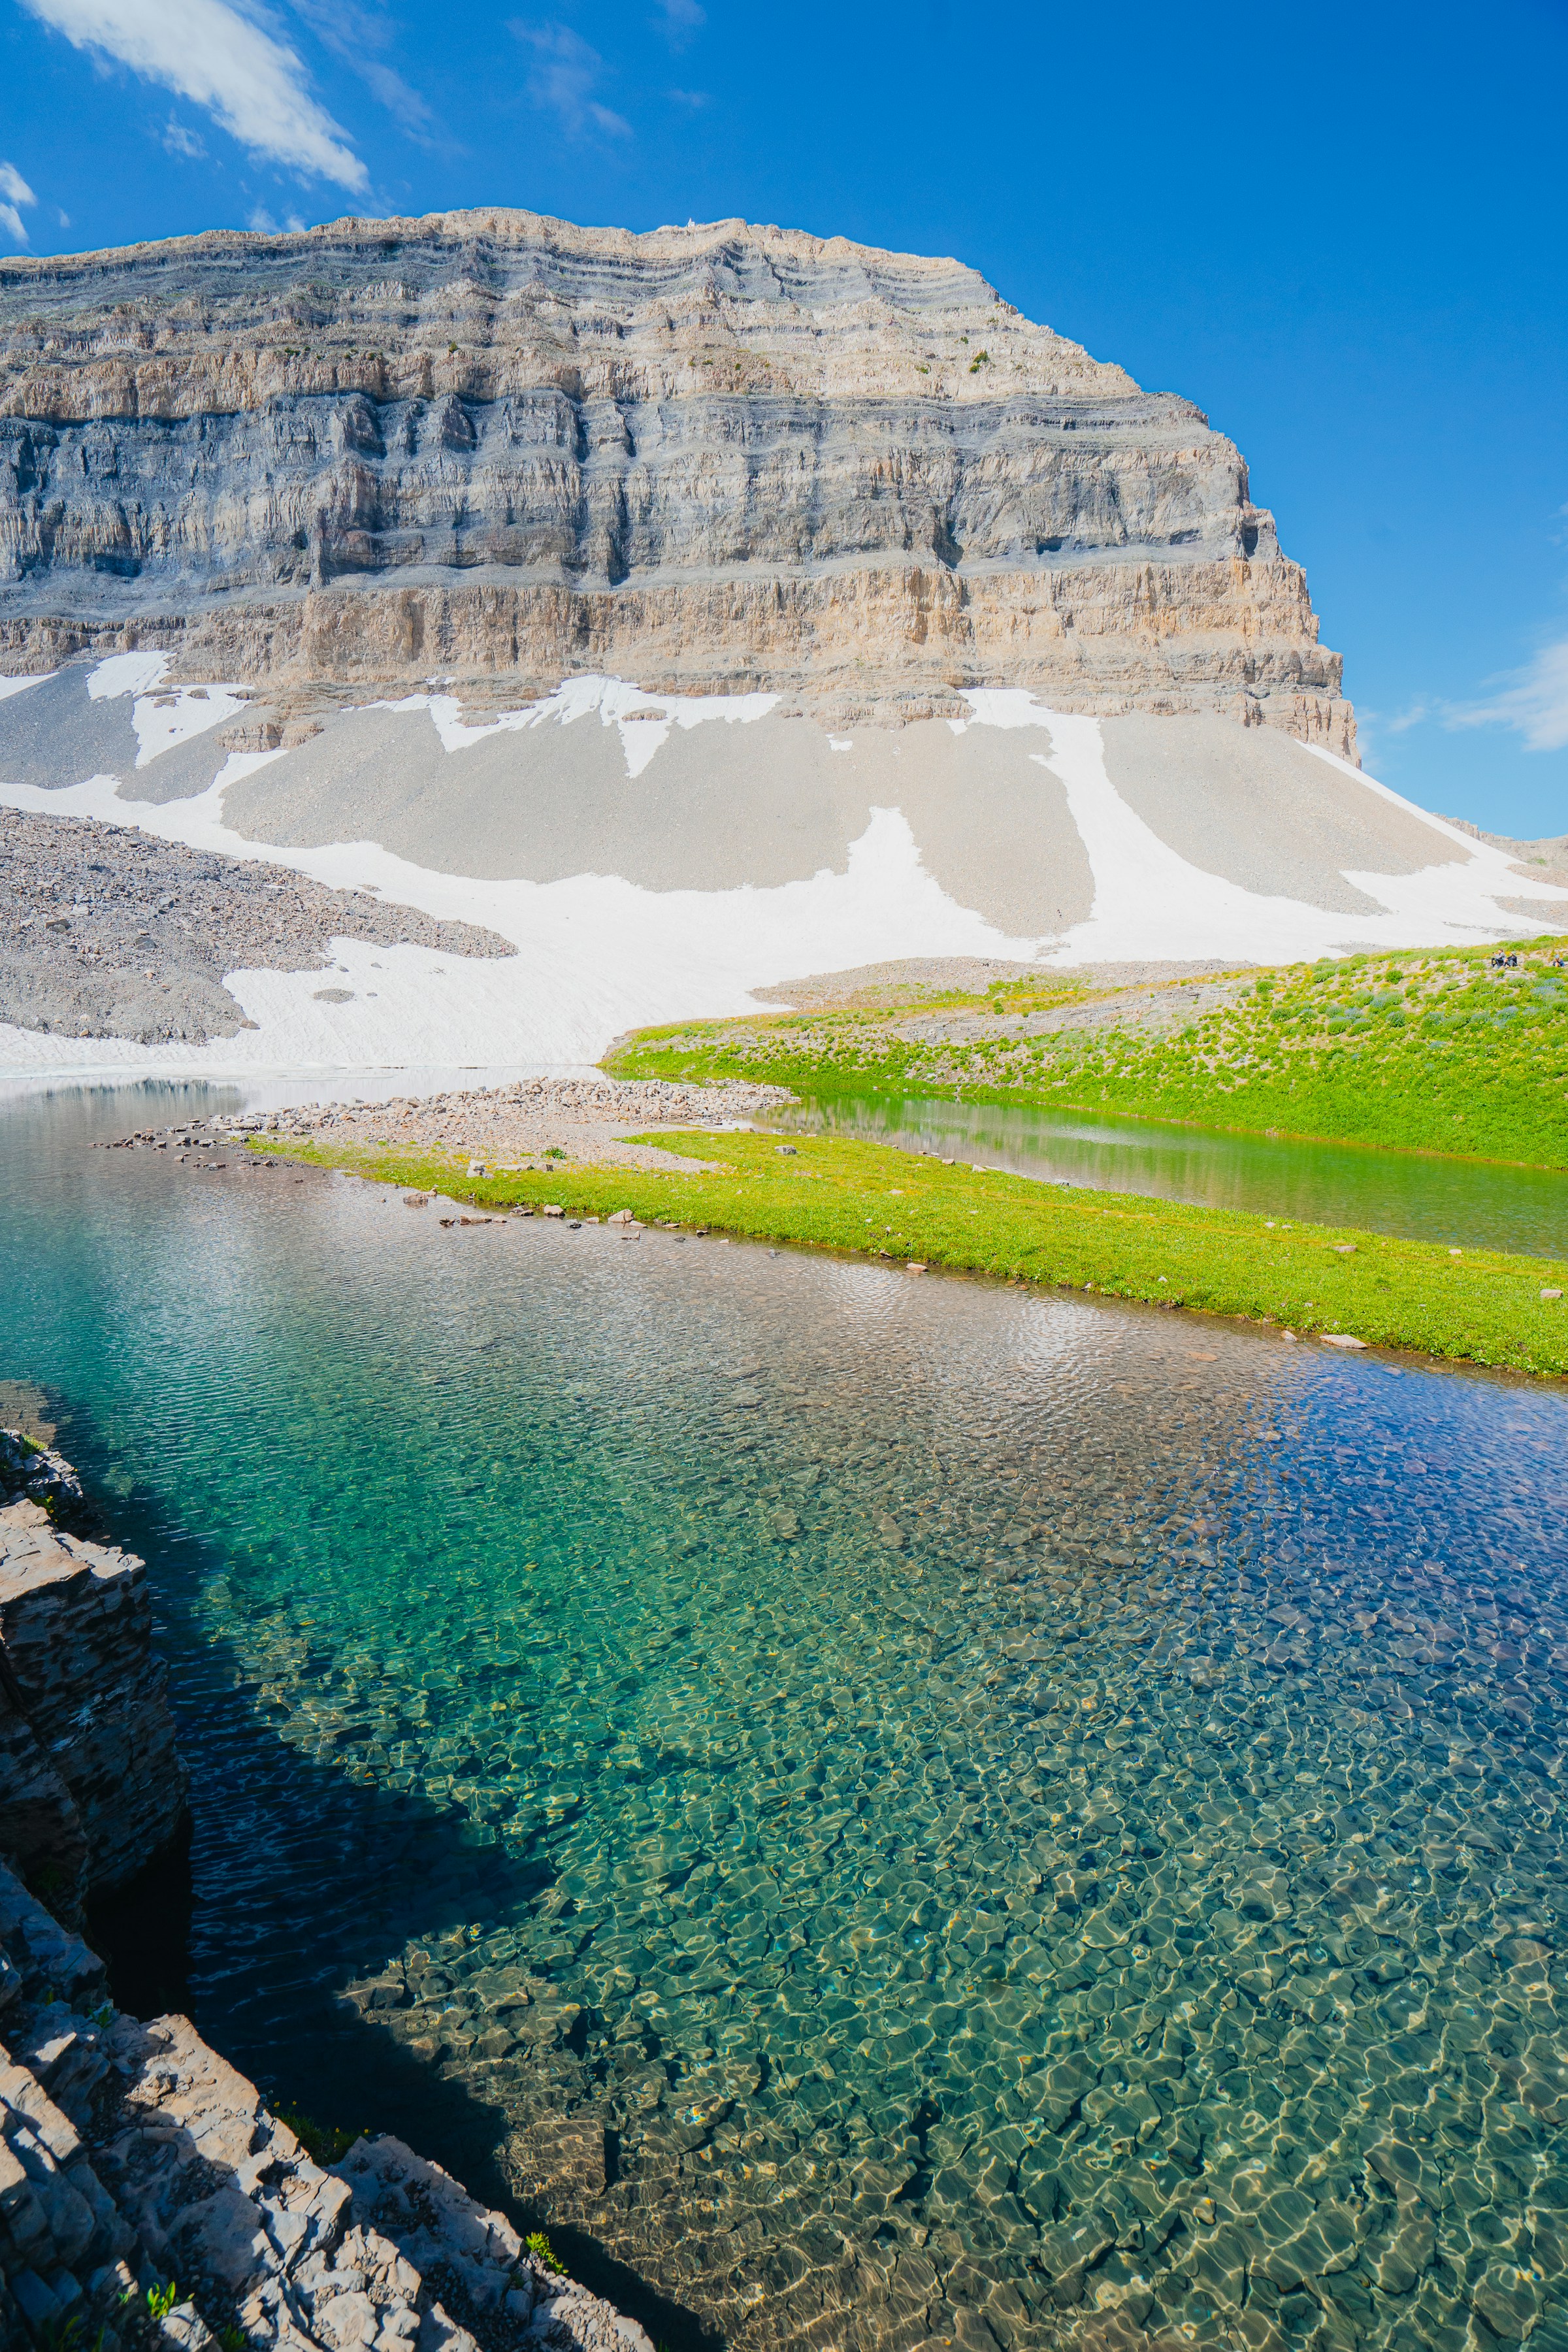
Download the demo landscape photo (JPG)
Follow the screenshots
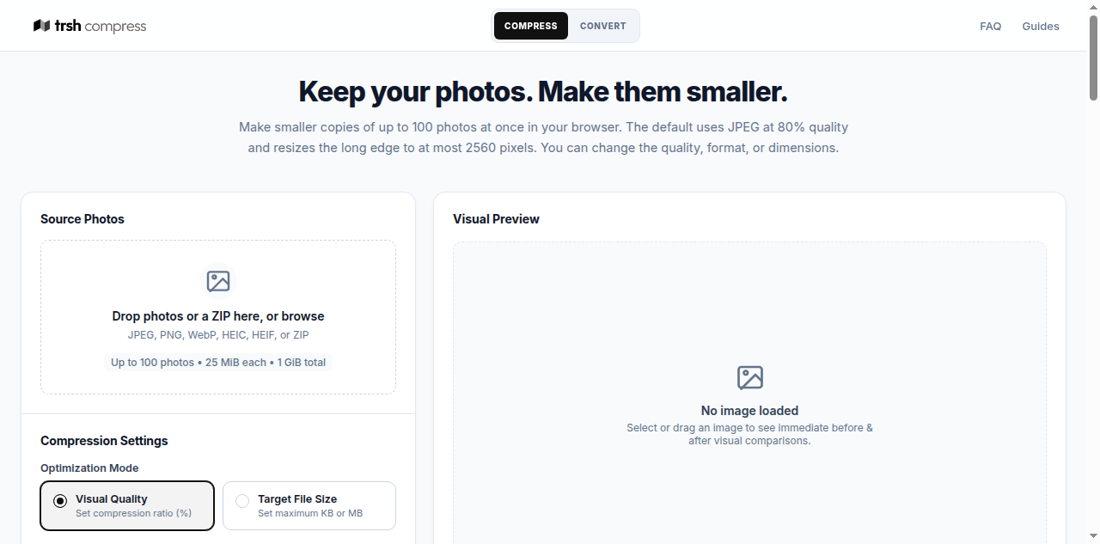
1. Open the compressor
Open the trsh compressor. The upload area appears in the left column.
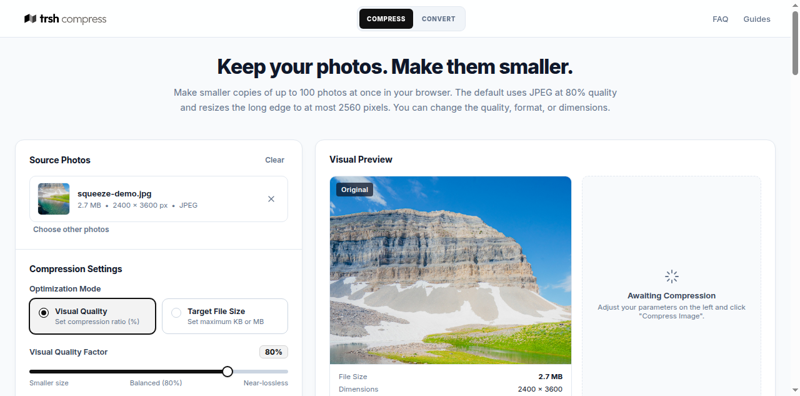
2. Select the demo photo
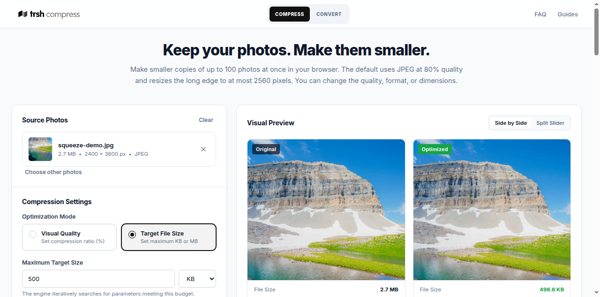
Click the upload area and select the JPG you downloaded. Wait for the preview and file details. trsh processes image pixels in your browser; it does not upload the image file.
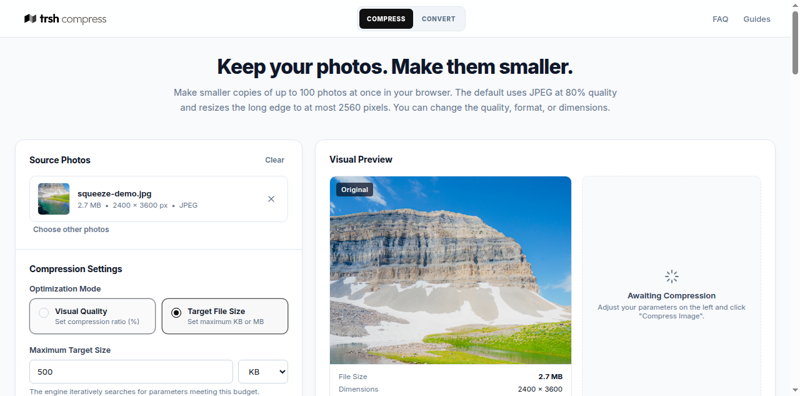
3. Set the output size
For a fixed upload limit, select Target File Size and enter a target below that limit. Otherwise, leave Visual Quality selected and adjust the quality control. JPEG works in most upload forms; use WebP when the destination accepts it.
4. Compress and inspect
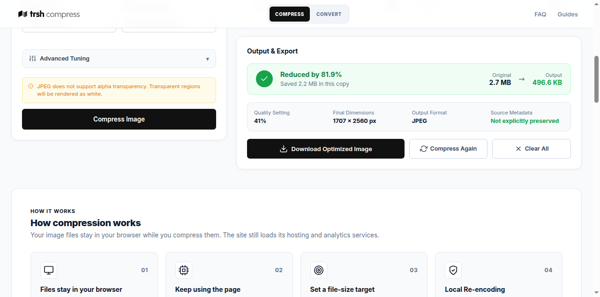
Click Compress Image. Compare the two previews, then check the output size and dimensions. Zoom in to inspect fine edges and small details.
5. Download the result
Click Download Optimized Image. Open the saved copy to check it. The source image remains unchanged.
If the result is not small enough
- Try WebP or JPEG for a photograph instead of PNG.
- Reduce quality gradually and inspect the preview after each change.
- If exact dimensions are not required, allow dimension downscaling.
- A tiny target can visibly damage details; preserve the original and choose the best balance for your use.
Related: compress under 200 KB · choose an image format · fix compression problems